Introduction
Fresh salsa is a delightful addition to any meal, especially when it combines vibrant fruits like kiwi, mango, and strawberries. This refreshing kiwi mango strawberry salsa offers a sweet and tangy burst of flavor that elevates everything from grilled meats to crisp salads.
The beauty of this salsa lies not only in its taste but also in its vibrant colors and healthy ingredients. Packed with vitamins and antioxidants, this fruit salsa brings a nutritious punch to your table. Let’s explore how to create this deliciously zesty dish.
Ingredients
- 2 ripe kiwis, peeled and diced
Kiwi adds a tangy sweetness and a vibrant green hue to the salsa. It's also rich in vitamin C and dietary fiber, enhancing the overall nutritional profile. - 1 ripe mango, diced
Mango offers a tropical sweetness that balances the acidity of the kiwi and strawberries. Its juicy texture adds a delightful mouthfeel that complements the other fruits. - 1 cup strawberries, hulled and diced
Strawberries contribute both color and a fresh sweetness, making the salsa even more enjoyable. They are loaded with antioxidants and vitamins, making this dish a healthy choice. - 1/4 red onion, finely chopped
Red onion adds a sharpness and depth to the salsa, balancing the sweet flavors of the fruit. It's also a great source of antioxidants and gives the salsa a delightful crunch. - 1 lime, juiced
Lime juice brightens the flavors and adds a refreshing acidity that enhances the fruitiness of the salsa. It also helps preserve the bright colors of the ingredients. - 1/4 cup fresh cilantro, chopped
Cilantro provides a fresh herbal note that brings all the flavors together. It's known for its digestive benefits and adds an aromatic element to the salsa. - Salt to taste
A pinch of salt enhances all the flavors, bringing out the sweetness of the fruit and adding a savory note that rounds off the dish.
Directions & Preparation
Step 1: Prepare the fruit
Start by peeling and dicing your kiwis and mango. Hull the strawberries and chop them to match the size of the other fruits. This step is essential because uniformity in size ensures an even distribution of flavors and textures in your salsa.
Step 2: Chop the red onion and cilantro
Finely chop the red onion and cilantro, keeping them separate from the fruits until you're ready to mix. The onion's sharpness will infuse the salsa, while the cilantro adds freshness. By preparing these ingredients separately, you can control the flavor balance better.
Step 3: Mix the fruits and vegetables
In a large bowl, combine the diced kiwi, mango, and strawberries with the chopped red onion and cilantro. Stir gently to combine without bruising the fruit. This step allows the different flavors to mingle, creating a balanced taste that enhances each ingredient's unique character.
Step 4: Add lime juice and salt
Squeeze the lime juice over the mixture and season it with a pinch of salt. Gently toss again to distribute the lime and salt evenly. This not only brightens the salsa but also prevents oxidation of the fruits, keeping them fresh and vibrant.
Step 5: Let it rest
Allow the salsa to sit for about 15-20 minutes before serving. This resting period is crucial as it allows the flavors to meld together, enhancing the overall taste. The wait is well worth it—your salsa will be bursting with flavor.

Flavor Pairing Variations
If you’re looking to experiment, there are several flavor variations you can consider for your kiwi mango strawberry salsa. For a spicier kick, finely diced jalapeños can be a fantastic addition, balancing the sweetness with heat. Alternatively, you could include chopped peaches or even pineapple for a different tropical twist, enhancing the overall fruity profile.
Perfect Serving Suggestions
This salsa can serve multiple purposes in your culinary repertoire. It's perfect as a topping for grilled fish or chicken, giving a refreshing counterpoint that brightens the dish. Alternatively, serve it as a flavorful dip with tortilla chips or over a bed of mixed greens for a light salad, showing its versatility in both main and side dishes.
Nutritional Benefits of Fresh Fruits
Incorporating this salsa into your meals not only enhances flavor but also boosts your nutrient intake. Kiwi is rich in vitamin C, which supports immune health, while mango and strawberries provide valuable antioxidants. These fruits help promote good digestion and overall well-being, making this salsa a guilt-free indulgence.
FAQs
Can I use frozen fruit for this salsa?
While fresh fruit provides the best flavor and texture, you can use frozen fruit if necessary. Just thaw and drain it first to avoid excess liquid.
What if my salsa turns out too runny?
If your salsa has excess liquid, try draining it gently through a fine mesh strainer. You can also add some diced apples or bell peppers to absorb the moisture.
How can I make this salsa spicier?
For a spicy twist, add finely minced jalapeños or a dash of hot sauce to your salsa before serving. Adjust the amount according to your heat preference.
Can I add a sweetener to balance tartness?
If your salsa is too tart, consider adding a teaspoon of honey or agave syrup to balance the flavors. Mix it in and taste as you go.
What other herbs can I use instead of cilantro?
If you're not a fan of cilantro, fresh mint or basil can be wonderful alternatives that will still provide a fresh herbal note.
How do I serve this salsa to make it visually appealing?
Serve your salsa in a clear bowl to showcase its vibrant colors. Garnish with a few whole cilantro leaves on top for an inviting presentation.
Conclusion
Fresh kiwi mango strawberry salsa is more than just a simple topping; it’s an explosion of flavors that can elevate any dish. With its colorful appearance and delightful taste, this salsa is bound to be a hit at your gatherings or family dinners.
Whether you're grilling outside or looking for a vibrant addition to your meals, this recipe is quick to prepare and versatile enough to suit many palates. Embrace the joy of fresh ingredients and enjoy every bite.
Recipe Card
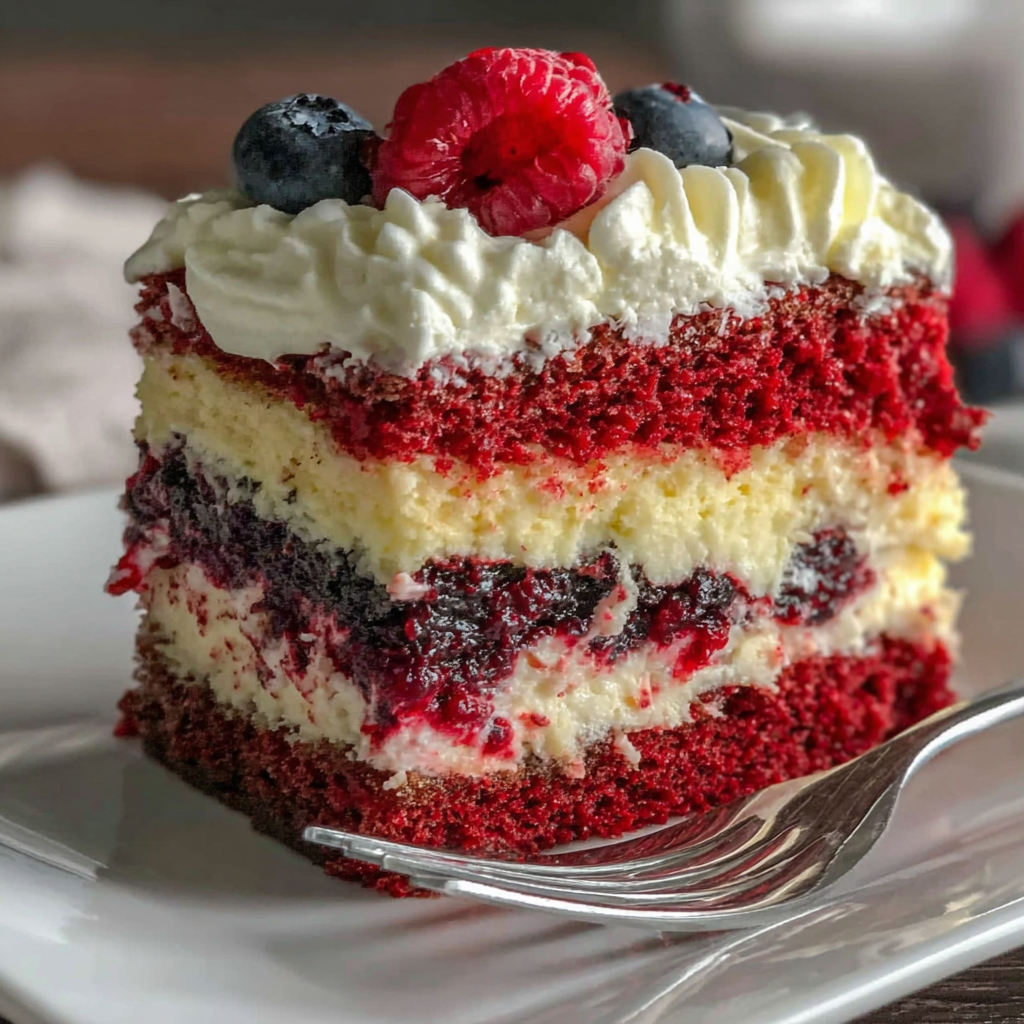
Celebrate with a Red White and Blue Flag Cake
Ingredients
Method
- Preheat your oven to 350°F (175°C).
- Grease and flour three 9-inch round cake pans.
- In a large mixing bowl, cream together the softened butter and sugar.
- Add the eggs one at a time, mixing well after each addition.
- Stir in the buttermilk and vanilla extract until combined.
- In a separate bowl, whisk together the flour and baking powder.
- Gradually add the dry ingredients to the wet mixture, mixing until just combined.
- Divide the batter evenly among the prepared pans.
- Bake for 25-30 minutes or until a toothpick inserted in the center comes out clean.
- Allow the cakes to cool in the pans for 10 minutes before transferring to a wire rack.
- Once cooled, frost between the layers and on the top with whipped cream.
- Decorate the top with halved strawberries and blueberries to create a flag design.
- Chill the cake for at least 30 minutes before serving.
Notes
Additional serving suggestions: pair with a crisp salad, garlic bread, or roasted seasonal vegetables for balance.
For make-ahead, prep components separately and assemble just before heating to preserve texture.
Taste and adjust with acid (lemon/vinegar) and salt right at the end to wake up flavors.