Introduction
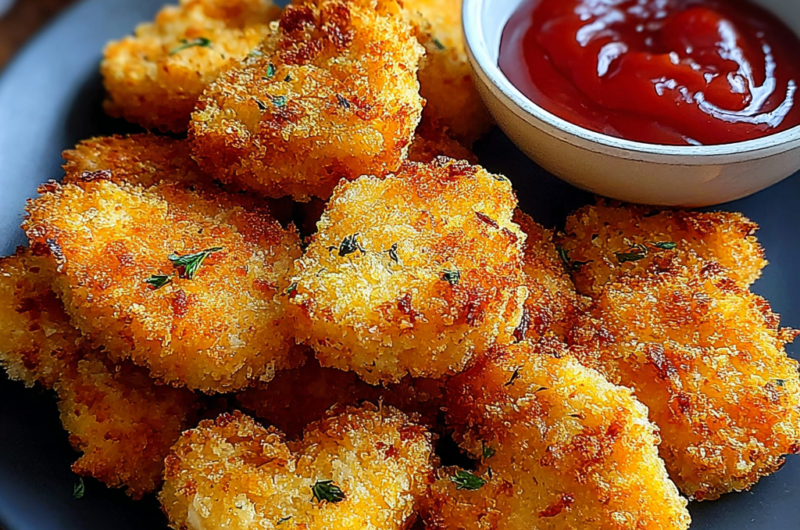
If you're looking for a quick and delicious meal that appeals to both kids and adults alike, crispy fryer chicken nuggets are a perfect choice. These golden bites are not only tender on the inside but have an incredibly satisfying crunch that gets everyone excited at the dinner table.
Making chicken nuggets at home allows you to control the ingredients and flavors, avoiding artificial preservatives and keeping health in check. With a few key pantry staples and a little bit of technique, you can whip up a batch of nuggets that will rival any restaurant’s offering.
Ingredients
- 1 lb boneless, skinless chicken breasts
This is the star ingredient, providing protein and moisture. Using chicken breasts ensures a lean, tender nugget that’s easy to work with and takes on flavors well. - 1 cup all-purpose flour
Flour helps create a crisp outer layer when fried. It also acts as a binding agent to help the seasonings adhere to the chicken, enhancing flavor and texture. - 1 cup breadcrumbs (preferably panko)
Panko breadcrumbs add an extra crunch to the nuggets. Their lighter texture allows for more air in between, leading to a crispier finish compared to traditional breadcrumbs. - 1 teaspoon garlic powder
Garlic powder infuses a savory depth to the chicken’s flavor. It’s a convenient way to add a robust taste without the hassle of fresh garlic. - 1 teaspoon onion powder
Onion powder complements the garlic, providing a sweet and savory balance. This enhances the overall flavor profile of the nuggets without overwhelming them. - 1 teaspoon smoked paprika
Smoked paprika contributes a rich, smoky element that adds complexity. It also gives the nuggets a beautiful color, making them visually appealing. - 1 teaspoon salt
Salt is essential to bring out the natural flavors of the chicken and spices. It enhances taste and aids in moisture retention during cooking. - ½ teaspoon black pepper
Black pepper adds a touch of heat and sharpness. It balances the richness of the fried nuggets and contributes to the overall seasoning. - 2 large eggs
Eggs act as a binding agent that helps the coating adhere to the chicken. They also add moisture, ensuring the nuggets remain juicy inside. - Vegetable oil for frying
Oil is necessary for frying, helping to achieve that coveted crispy exterior. Choose a neutral oil with a high smoke point to prevent burning.
Directions & Preparation
Step 1: Prep the chicken.
Start by cutting the chicken breasts into bite-sized pieces, ensuring uniformity for even cooking. Evenly sized nuggets cook at the same rate, preventing some from being overdone while others remain undercooked. Pat the chicken dry with paper towels to help the coating stick better.
Step 2: Set up the breading stations.
Prepare three shallow bowls: one for flour mixed with salt, pepper, garlic powder, onion powder, and smoked paprika, another for beaten eggs, and the last for panko breadcrumbs. This assembly line method streamlines the breading process, making it less messy and more efficient. Additionally, the seasoning in the flour layer provides the first flavor impact.
Step 3: Dredge the chicken.
Coat each piece of chicken first in the flour mixture, then dip it in the beaten eggs, and finally roll it in the panko breadcrumbs. Each step is crucial; the flour creates a dry surface, the egg acts as glue, and the panko provides the crispy texture. Ensure each piece is thoroughly coated for the best results.
Step 4: Heat the oil.
In a deep fryer or large pot, heat about 2 inches of vegetable oil to 350°F (175°C). Using a thermometer is important for achieving the right frying temperature, which secures a crispy exterior while keeping the inside juicy. If the oil is too cool, the nuggets will absorb more oil and become greasy; too hot, and they will burn on the outside before becoming fully cooked inside.
Step 5: Fry the chicken nuggets.
Carefully place the breaded nuggets into the hot oil in batches, ensuring not to overcrowd the pot. Each batch should fry for about 3-4 minutes, or until golden brown. Letting them fry undisturbed helps form a crisp layer, while turning them ensures even cooking. Use a slotted spoon to remove them and place on paper towels to drain excess oil.
Step 6: Serve and enjoy.
Once all nuggets are fried, serve immediately with your favorite dipping sauces. Enjoy the delightful contrast of the crispy exterior and tender interior with each bite. They can be served with honey mustard, barbecue sauce, or even a spicy aioli for an extra kick.

Perfecting the Crispy Coating
Achieving a crispy, golden coating is all about technique. The combination of flour, egg, and panko creates a three-layer barrier that fries up beautifully. For added crunch, consider double-dipping the nuggets in the egg and panko. Allowing the breaded nuggets to rest for 10-15 minutes before frying also helps ensure that the coating adheres during frying, resulting in an irresistibly crunchy exterior.
Choosing the Right Oil
The oil used for frying can drastically affect the outcome. Select a high smoke point oil like vegetable or peanut oil to withstand the frying temperature without burning. This choice is crucial for maintaining the flavor of your nuggets and achieving that perfect golden color. Additionally, you can reuse oil after frying if it hasn’t been heavily contaminated, making it more economical in the long run.
Flavor Variations to Try
While the classic seasoning combination works wonders, feel free to experiment with flavors. Adding cayenne pepper for heat or dried herbs like oregano or thyme can transform the basic nugget into something uniquely delicious. You can also try marinating the chicken in buttermilk overnight, which not only tenderizes the meat but also infuses it with moisture and flavor, elevating your fryer chicken nuggets to the next level.
FAQs
What if my coating is too thick?
If the coating is too thick, ensure that excess flour is tapped off after dredging the chicken. You can also consider thinning the egg mixture slightly with a bit of water to allow for a better adhesion of the panko.
Can I use other meats instead of chicken?
Yes, turkey or even firm fish can be used, but adjust cooking times based on thickness. Fish will require less frying time, while turkey may need a bit longer to ensure proper cooking.
How can I prevent the nuggets from burning?
To prevent burning, monitor the oil temperature closely and maintain it at 350°F. Avoid frying too many nuggets at once, as that can cool down the oil and lead to uneven cooking.
What dipping sauces pair well with these nuggets?
Classic options include honey mustard, ranch dressing, barbecue sauce, and ketchup. You can also create a spicy mayo by mixing mayonnaise with hot sauce for an excellent pairing.
Why do my nuggets end up soggy?
Soggy nuggets are often the result of overcrowding the frying pan, which lowers the oil temperature. Ensure ample space for each piece to fry evenly and maintain oil temperature throughout the cooking process.
Is it better to bread my chicken nuggets ahead of time?
Breaded chicken nuggets can be prepped ahead, but for best results, fry them fresh. If needed, store the breaded nuggets uncovered in the fridge for up to an hour before frying to retain crispiness.
Conclusion
With a few essential ingredients and mindful techniques, crispy fryer chicken nuggets can become a staple in your home kitchen. They’re perfect for family dinners or as a fun party snack, inviting everyone to enjoy the homemade flavor.
By experimenting with different seasonings and dipping sauces, you can tailor them to your family's taste preferences. So roll up your sleeves and get ready to delight everyone with your delicious homemade nuggets!
Recipe Card
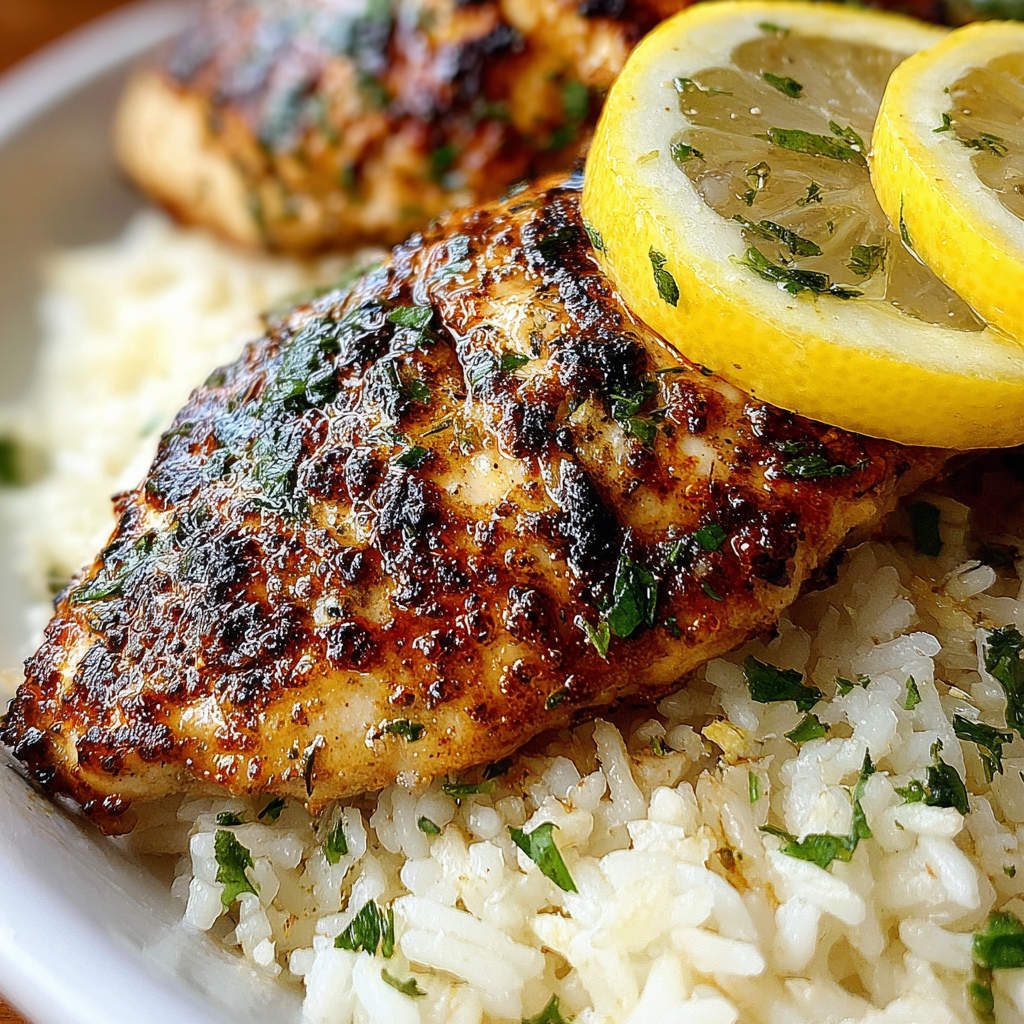
Savor the Flavors of Greek Chicken and Lemon Rice
Ingredients
Method
- Marinate the chicken breasts in olive oil, oregano, lemon juice, salt, and pepper for at least 30 minutes.
- In a large skillet, heat a tablespoon of olive oil over medium heat. Add the marinated chicken breasts and cook for about 6-7 minutes on each side until they are golden brown and cooked through.
- Once the chicken is removed, use the same skillet to sauté any leftover marinade for a minute before adding the rice.
- Add the long-grain rice to the skillet and stir it into the remnants of the marinade. Cook for about 1-2 minutes, allowing the rice to toast slightly.
- Pour in the chicken broth along with lemon zest, bringing the mixture to a gentle boil.
- While the rice cooks, keep the chicken warm on a plate covered with foil to retain heat.
- Once the rice absorbs all the liquid, fluff it gently with a fork before removing it from heat.
- Serve the cooked chicken on a bed of lemon rice, garnishing with fresh parsley and additional lemon wedges if desired.
Notes
Additional serving suggestions: pair with a crisp salad, garlic bread, or roasted seasonal vegetables for balance.
For make-ahead, prep components separately and assemble just before heating to preserve texture.
Taste and adjust with acid (lemon/vinegar) and salt right at the end to wake up flavors.

